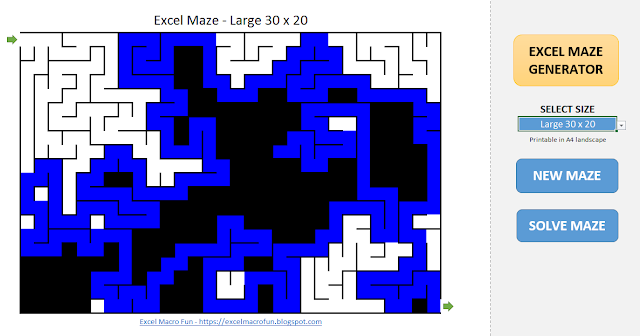
Let's see how to leverage a classic algorithm to create a maze in Excel using VBA macros. The method used to generate the maze follows the randomized depth-first search algorithm. The maze caving process in this version of Excel Maze Generator is visual and can be followed directly on the worksheet, in order to help readers better understand how the algorithm works.
Maze Generation Algorithms
There are quite a number of algorithms to generate a maze using a computer. Some of those include the randomized depth-first search algorithm, randomized Kruskal's algorithm, randomized Prim's algorithm, and Wilson's algorithm, among others. If you are interested to know more about it, go ahead and have a look at the Wikipedia article for maze generation algorithm.
Example of maze generation with the randomized depth-first search algorithm
Example of maze generation with the randomized Kruskal's algorithm
Example of maze generation with the randomized Prim's algorithm
This version of Excel Maze Generator uses the randomized depth-first search algorithm, also known as the recursive backtracker algorithm. It is probably the simplest way to generate a maze using a computer, and consists of caving through each unvisited compartment in the grid and removing the separation (wall), until all compartments around have already been visited, then backtracking to the point where unvisited compartments can be found.
Excel (and other spreadsheet applications) offer the perfect environment to draw a maze using a range in a worksheet as the grid, and each cell within the range as the compartments. The cell interior and border properties of the range/cells objects allows to easily format the grid while generating the maze.
Excel Maze Layout
Excel Maze Generator uses a rectangular grid layout with three size options that fit into an A4 page for printing purposes (portrait for small and medium size, and landscape for large).
Prior to starting the maze generation process, the grid consists of a range of cells with black borders and a black interior. That makes the borders not visible at first. The interior colour changes through the generation process, thus making the borders visible while caving through the maze (see next section).
The code to format a small grid with black thick borders and black interior could look like this:
If we do not set the interior to black, the initial grid should look like the image below – all cells have thick borders around.
Maze Generation Process
Starting at one chosen compartment in the grid (usually, the end or beginning of the maze, but not necessarily), Excel Maze Generator caves through the grid in random directions, looking for unvisited neighbours around. If the neighbour cell has not yet been visited, it removes the border between the two cells, and repeats the process. That’s the basis of the randomized depth-first search algorithm. If all cells around have already been visited, then it goes back to a cell that has unvisited neighbours and starts all over. Using the Excel VBA interior and border properties of the Range/cells objects helps storing backtracking information in the maze itself. Let’s break down the process to understand it better (the illustrations below show the borders in red to help follow the explanation):
Let’s say we start in cell B4 (left-top corner of the range B4:U13). As it was not yet visited, we mark it as visited by changing the interior color of the cell to blue. Specifically, the code checks if the interior color is black (it is all black at the start).
Next, we randomly select a neighbour cell. For B4 there are only two options, either C4 or B5 (marked in yellow in the image below, just for explanation purposes), the other cells (B3 and A4) are out of bounds. If the selected cell has not yet been visited (black interior), we can remove the border between the two cells and mark it as visited (blue interior). We use the attribute of the borders property to target the exact edge: xlEdgeBottom, xlEdgeRight, xlEdgeTop, xlEdgeLeft (see code below).
The following piece of code checks if the maze can progress or cave down the active cell (r+1), where r and c are the row and column numbers of the active cell respectively, and direc=1 represents the downwards direction (we randomly choose a direc number from 1 to 4 for each direction around). If not visited, we remove the bottom border (xlEdgeBottom) and move into the cell underneath (r=r+1).
Again, as it was not visited yet, we change the interior colour to blue.
The process continues moving around the grid and caving through the maze by removing borders.
At some point, all neighbours have been visited, so we mark that cell in a different colour to show that, not only has been visited, but it has also been searched all around. In this version of Excel Maze Generator, we do that by changing the interior colour to white (as the final maze will be white with black borders).
Then, we go back through open borders until finding a cell with unvisited neighbours, and move in other direction to continue caving and generating the maze.
The process goes on following the maze generation algorithm and caving through the net of walls inside the maze as previously explained.
The reverse backtracker algorithm ensures all cells are visited and repeats the whole process until the whole grid has been visited; for the code of this version of Excel Maze Generator, that means until all cells have a white interior. The final maze should look like the image below.
Additionally, Excel Maze Generator stores the final track in a hidden sheet to allow showing the solution instantly.


No comments:
Post a Comment